最终效果见我的博客:https://blog.tech.top
静态博客系统技术栈为:Hexo + Next Theme
安装过程
1. 全局安装hexo-cli
1 | npm install -g hexo-cli |
2. 初始化博客
最好是空目录,如果不是空目录,需要安装到临时目录,然后拷贝过来。
1 | hexo init blog |
3. 安装Next主题
进入博客目录,安装Next主题
1 | cd blog |
4. 修改博客配置文件,设置主题为Next
文件:_config.yml
1 | # 修改主题为next |
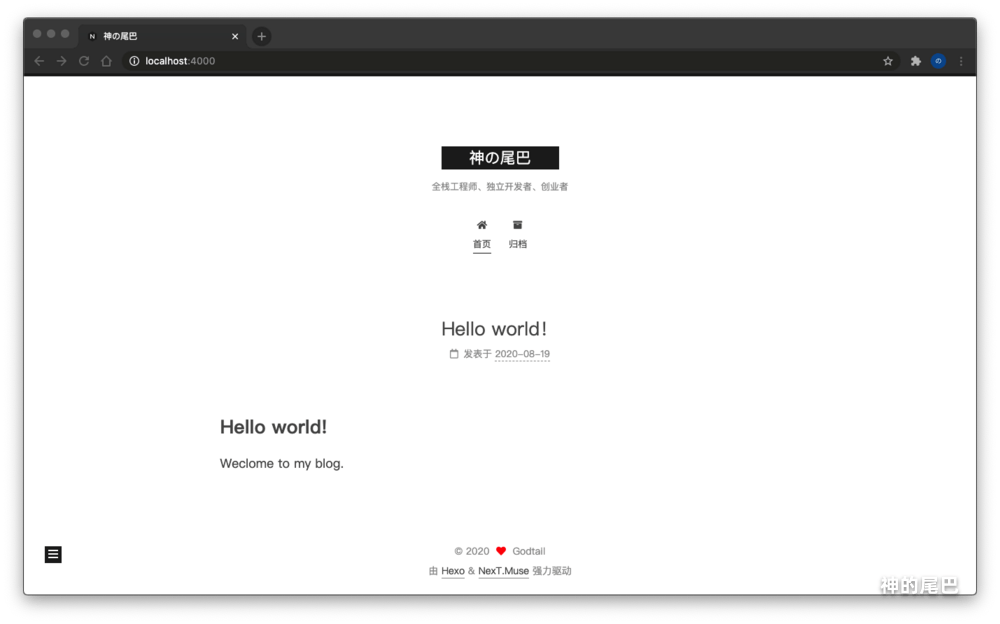
5. 运行博客查看效果
启动hexo server
1 | hexo server |
启动后,访问:http://localhost:4000,查看博客效果,如下图所示:
6. 提交代码到github
创建仓库,仓库名需要为<github user id>.github.io(这样才能绑定到主域),public或private都行,提交你的代码,如果没有敏感数据建议你使用public。
如果设置private,发布到github pages,需要升级账户,支付4$/月,另外后面配置gitalk,需要另外添加一个public的仓库。
如何写文章并发布
hexo模板包含以下几类
- 草稿:保存在source/_draft目录,用来存储未发布的文章;
- 已发布文章:保存在source/_post目录,用来存储已发布的文章;
- 页面:保存在source/_page目录,存储那些静态页面;
发布一篇文章的流程
- 执行命令
hexo new draft 测试文章添加一篇文章草稿,设置标题、分类、标签等;
1 | --- |
- 执行命令
hexo publish 测试文章,会自动添加发布时间,并把博文移到_posts目录; - 刷新页面,这时候已经能看到新发布的博文了。
文章小技巧
显示阅读全文
使用 <!-- more --> 分割预览部分和全文。
1 | 预览部分 |
Next进阶配置
配置关于、分类、标签
修改Next主题配置文件 _config.yml,打开menu里面tags、categories的注释。
1 | menu: |
刷新已经能看到分类、标签入口了,但是打开是404,因为我们还没有配置页面,So,现在我们添加tags页面和categories页面。
1 | # 添加关于页面 |
配置搜索
在博客文章较少的情况下,先使用本地搜索,后面换为其他搜素引擎。
- 安装搜索插件
npm install hexo-generator-searchdb --save; - 修改配置文件
_config.yml,添加以下内容;
1 | search: |
- 修改next配置文件
themes/next/_config.yml,设置启用本地搜索。
1 | local_search: |
配置版权声明
修改Next主题配置文件 themes/next/_config.yml,开启版权声明。
1 | creative_commons: |
配置预加载
可能部分浏览器不支持
修改Next主题配置文件 themes/next/_config.yml,开启预加载。
1 | quicklink: |
配置动画
根据个人喜好调节,因为我更关注内容。
修改Next主题配置文件 themes/next/_config.yml
1 | motion: |
配置评论
现在国内能用于留言的太少了,Disqus、多说、网易云跟帖、Valine(v1.4.0后暂停更新)…要不关闭了,要不就暂停更新了。
因为大部分访问用户还是在国内,所以还是尽量找一个国内访问比较顺畅的。
目前比较好的两个选择是 Disqus JS、Gitalk:
- Disqus JS 能够根据用户网络自动切换到 Disqus(评论完整模式)和 DisqusJS 提供的评论基础模式。优点是:支持国外主流社交登录,且UI美观、体验很好。缺点:如果在限制区域没有特殊手段只能看评论,无法发送评论。
- Gitalk 国内目前还可以访问,虽然速度有点慢,缺点:只支持github用户。
考虑到目标人群、易用程度等,最终选择了 gitalk 方式。
gitalk配置指南
- 如果博客仓库是公开,直接使用博客仓库。如果是私有,创建一个 Github 仓库,设置为 public 即可,无其他要求;
- 创建Github Application,去申请,其中
Authorization callback URL填写你博客的域名,例如你搭建到github的域名。测试时,可以填写http://localhost:4000; - 修改配置文件
theme\next\_config.yml启用gitalk。1
2
3
4
5
6
7
8
9
10
11
12
13
14
15
16
17
18
19
20gitalk:
# 开启 github
enable: true
# 你的 github id
github_id: # GitHub repo owner
# 你的仓库名称
repo: # Repository name to store issues
# Github Application 的 Client Id
client_id: # GitHub Application Client ID
# Github Application 的 Client Id
client_secret: # GitHub Application Client Secret
# 管理员 github id, 这里可以使用你的 github id,初始化的时候需要指定用户才能初始化
admin_user: # GitHub repo owner and collaborators, only these guys can initialize gitHub issues
# 是否开启输入聚焦遮罩(建议关闭)
distraction_free_mode: true # Facebook-like distraction free mode
# Gitalk's display language depends on user's browser or system environment
# If you want everyone visiting your site to see a uniform language, you can set a force language value
# Available values: en | es-ES | fr | ru | zh-CN | zh-TW
# 语言
language: zh-CN
有一点需要注意的是,每篇文章需要初始化一个 issue,不然用户无法评论。
配置打赏
微信支付宝都支持下载收款码,下载后保存为
wechatpay.png、alipay.png,复制到source/images目录(如果没有,自己创建一个)。
1 | reward_settings: |
配置统计
这里使用 Google Analytics 进行统计分析,点击申请
1 | # Google Analytics |
SEO优化
Google、百度网站验证
如果是部署到 GitHub Pages,需要选择 网址前缀 方法,因为我们修改不了 GitHub 的 DNS。
选择使用 Google Analytics(分析) 方式验证,因为之前已经配置过,所以可以直接验证成功。
选择验证方式 HTML标签验证。
修改视图文件 themes/next/layout/_partials/head/head.swig 添加对应标签。
1 | <meta charset="UTF-8"> |
开启百度推送
修改配置文件 themes/next/_config.yml
1 | # 开启百度推送 |
添加站点地图 sitemap
- 安装站点地图依赖;
1 | npm install hexo-generator-sitemap --save |
- 修改配置文件
_config.yml。
1 | # 添加以下内容 |
- 修改配置文件
_config.yml修改你的域名;
1 | # 修改为你的域名 |
- 去 Google Search Console 配置
sitemap.

允许爬虫抓取页面
在 source 添加 rebots.txt 文件,内容如下:
1 | User-agent: * |
部署到github
部署流程
- 安装插件
npm install hexo-deployer-git --save; - 修改 hexo 配置文件
_config.yml;
1 | deploy: |
- 部署博客
hexo clean && hexo deploy。
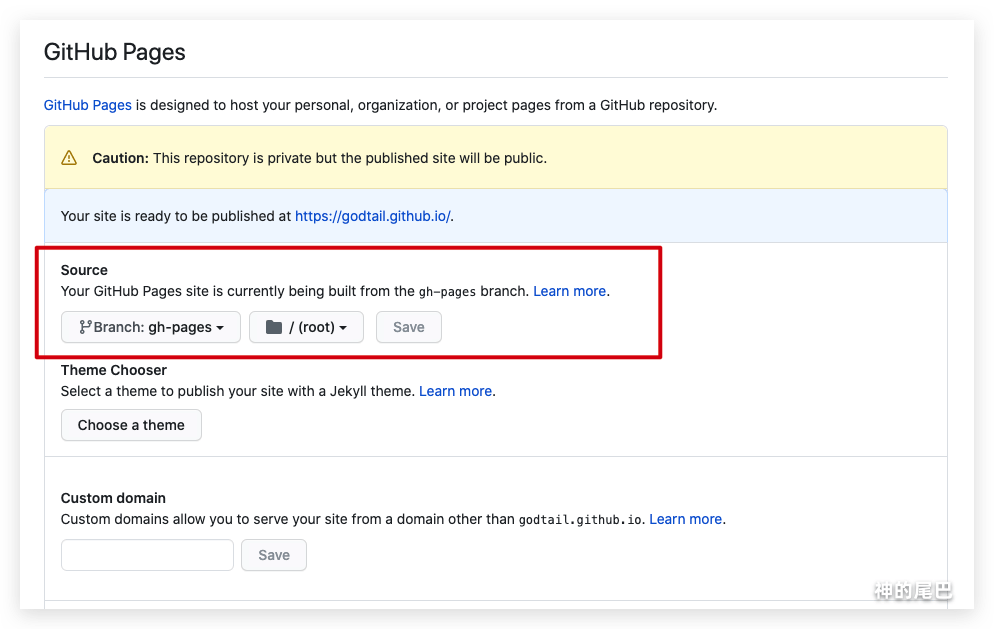
部署完成后,到仓库 Setting 发布 GitHub Pages。
待改进的地方
毕竟是静态博客,无后台,所以有些功能,比如说搜索、阅读数、文章阅读、评论、点赞、评分都得借助第三方平台,目前大部分第三方平台不稳定、免费限制多,收费较贵(例如leancloud,商用版30/天)。
后面准备使用Serverless整合下这些功能。